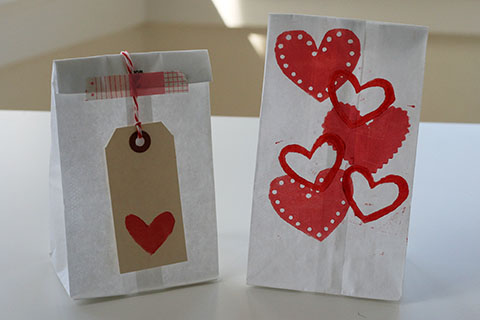
I’ve been meaning to write a post about one of the simplest printmaking techniques I know for a while (it’s the same technique I used in my first 52 Weeks of Printmaking print). It’s a technique I learned from a class I took with Susan Schwake, and it’s my go-to method when I want to make wrapping paper and gift tags quickly.
With Valentines Day coming, I thought now would be a great time for this little tutorial. You don’t need too many special tools or skills (other than the ability to use a pair of scissors).
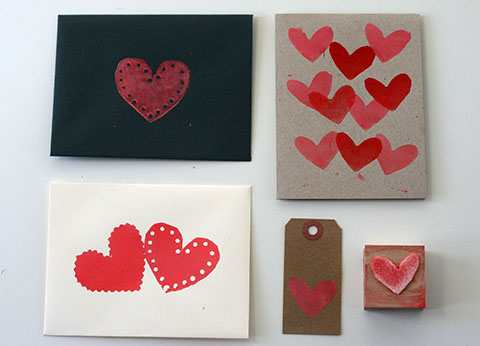
Here’s what you’ll need:
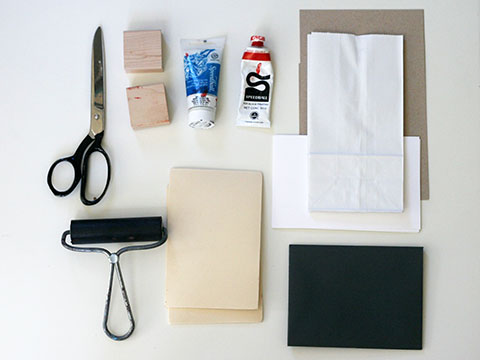
- Sharp-ish pair of scissors
- Wood blocks to adhere your stamps to (I bought a box from eBay, but you can also find them at re-use centers, or you can use bits of plexiglass, or very rigid cardboard)
- Block printing ink (available at art supply and crafting stores)
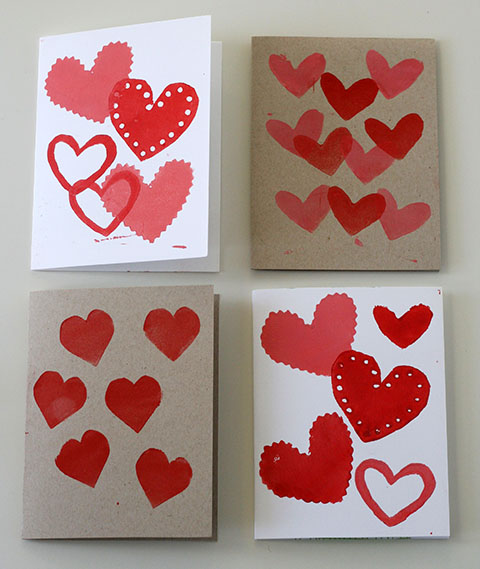
- Things to print on – card stock, paper bags, tags, envelopes
- Adhesive foam, such as WonderFoam (available at art supply and crafting stores)
- A brayer, for applying ink to your printing block
- A flat surface to roll your ink onto (not pictured; I use sheets of plexiglass from SCRAP, but you can also use a flat tray, cookie sheet, or plate)
- Optional: pinking shears, hole punch, x-acto knife
Instructions:
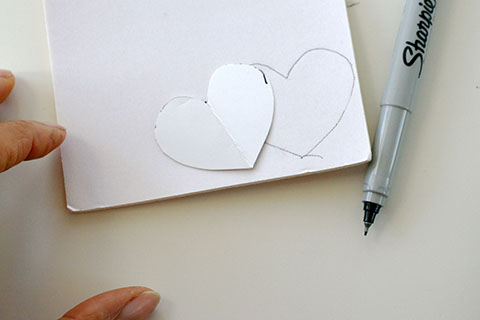
First, trace the image you’d like to print onto the reverse side of the adhesive foam. This is especially important if you’re planning to cut out letters.
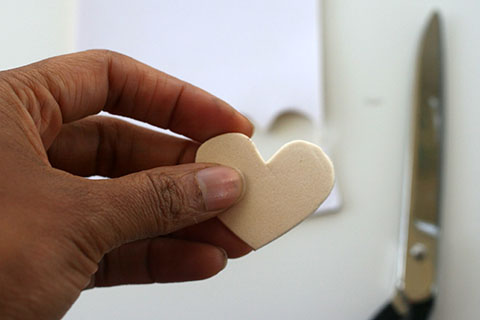
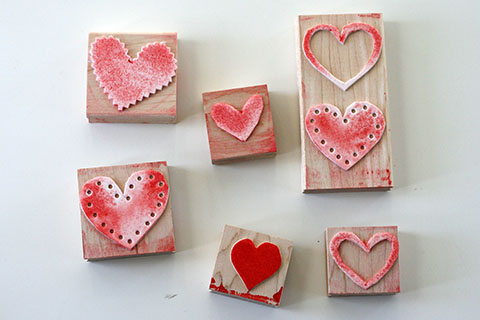
Next, cut out the shape. The foam is really easy to cut; no carving tools needed!
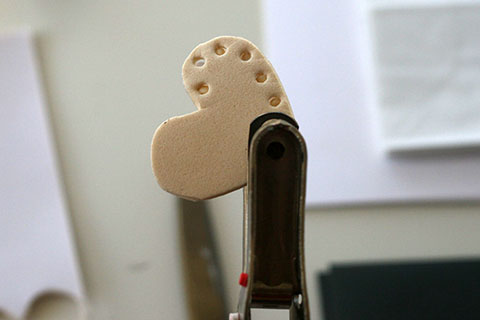
You can punch holes into the foam, draw on it, or cut into it, for special effects.
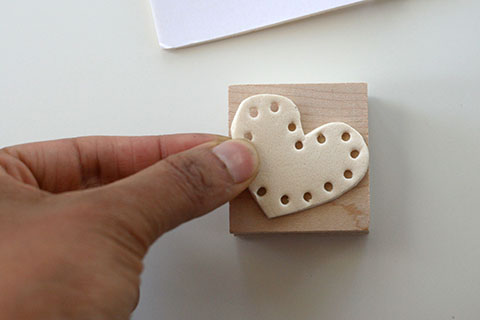
Peel off the foam’s backing and stick your image onto your wood block.
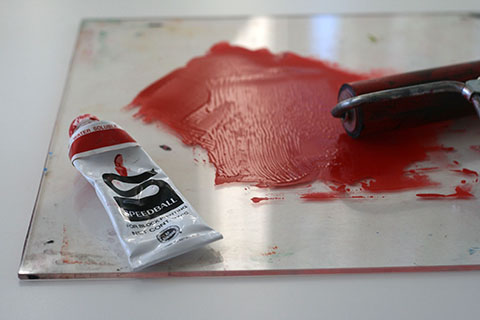
Using your brayer, roll your ink onto your flat surface until you have a thin, sticky layer.
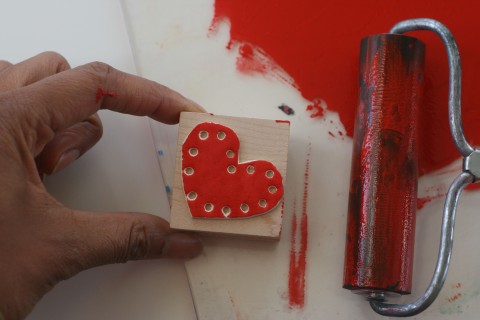
Then, still using your brayer, roll your ink onto your printing block until the image area is thoroughly coated. Don’t roll too much ink on, because that will make it harder to get a crisp print. And don’t dip your block onto the ink, as if it were a stamp pad. You won’t get a thin coat that way.
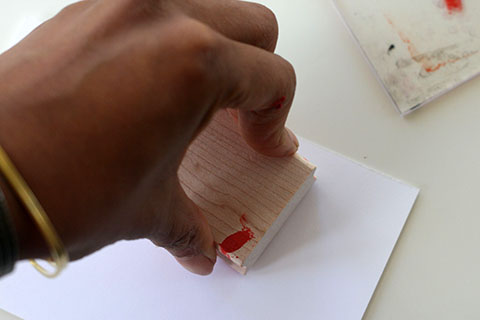
Now it’s time to print! Make sure that you put a lot of pressure on your block so that your entire image prints…
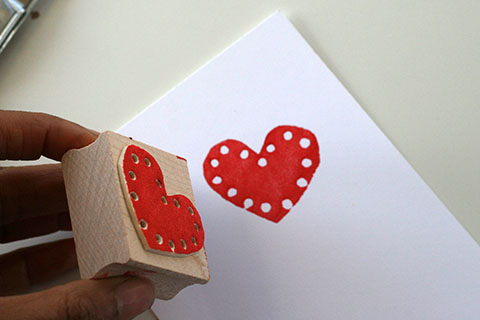
…like so!
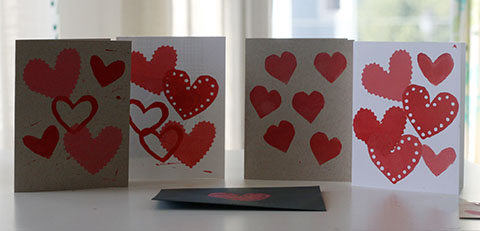
You can print with more than one color, if you’d like (really, the more the merrier). And don’t worry about making everything look perfect. The bits of stray ink make it look like you carved your stamps by hand; though if the stray ink bothers you, wipe the ink off the sides of your printing block.
And now you’re a printmaker! Please share photos of your work on Instagram, using the hashtag #handmadevday.
Hello colleagues, how is everything, and what you want to say regarding this piece of writing, in my view its actually remarkable in support of me.
Greetings! Very helpful advice within this post! It is the little changes
that will make the most significant changes. Thanks for
sharing!
This info is invaluable. How can I find out more?
Its like you read my mind! You seem to understand so much approximately this, such as you wrote the guide
in it or something. I feel that you just can do with a few p.c.
to drive the message home a bit, however instead
of that, this is excellent blog. A great read. I will definitely be back.
I just want to mention I am just all new to weblog and honestly loved you’re blog site. Almost certainly I’m want to bookmark your blog post . You amazingly come with outstanding posts. Bless you for revealing your web page.
Your area is valueble for me. Many thanks !?
Found this on MSN and I’m happy I did. Well written article.
These kinds of Search marketing boxes normally realistic, healthy and balanced as a result receive just about every customer service necessary for some product. Link Building Services
Howdy! Do you use Twitter? I’d like to follow you if that would be ok. I’m undoubtedly enjoying your blog and look forward to new updates.
We stumbled over here by a different page and thought I may as well check things out. I like what I see so now i am following you. Look forward to looking over your web page yet again.
You ought to participate in a competition for one of the best blog sites on the web. I will certainly recommend this site!
There is noticeably a bundle to find out about this. I think you made sure good points in functions also.
I like your writing style genuinely loving this internet site .
I wanted to thank you for this excellent read!!
I absolutely loved every little bit of it. I’ve got you
book-marked to check out new stuff you post…
A fascinating conversation deserves remark. I think that you ought to create extra on this topic, it may not be a taboo topic however usually individuals are not nearly enough to speak on such topics. To the next. Thanks
Pretty portion of content. I just stumbled upon your weblog and in accession capital to assert that I acquire in fact loved account your weblog posts.
Any way I’ll be subscribing in your augment and even I
achievement you get right of entry to constantly fast.
really wonderful post, i absolutely like this web site, keep on it
An impressive share, I just offered this onto a coworker that was doing a little evaluation on this. As well as he actually acquired me morning meal because I discovered it for him. smile. So let me reword that: Thnx for the reward! Yet yeah Thnkx for spending the moment to discuss this, I really feel highly regarding it and love reading more on this subject. Ideally, as you end up being knowledge, would certainly you mind updating your blog with more details? It is very valuable for me. Big thumb up for this blog post!
I?d need to get in touch with you here. Which is not something I normally do! I appreciate reviewing an article that will make people believe. Additionally, many thanks for enabling me to comment!
Everything is very open with a very clear explanation of the issues. It was definitely informative. Your website is very helpful. Many thanks for sharing!
It?s tough to find educated people on this topic, but you sound like you know what you?re discussing! Many thanks
An intriguing discussion is definitely worth comment. I think that you ought to publish more on this subject, it may not be a taboo subject but usually people don’t speak about these subjects. To the next! Many thanks!!
Excellent site you have got here.. It’s difficult to find high-quality writing like yours nowadays. I honestly appreciate people like you! Take care!!
This site definitely has all the information and facts I needed concerning this subject and didn’t know who to ask.
Hi, I do believe this is a great website. I stumbledupon it ;) I’m going to revisit yet again since i have bookmarked it. Money and freedom is the best way to change, may you be rich and continue to help others.
Good post. I will be experiencing a few of these issues as well..
Great site you have got here.. It’s difficult to find good quality writing like yours nowadays. I truly appreciate individuals like you! Take care!!
Good post. I learn something new and challenging on sites I stumbleupon every day. It will always be useful to read through articles from other writers and use a little something from other sites.
I used to be able to find good info from your content.
Good information. Lucky me I came across your site by accident (stumbleupon). I’ve bookmarked it for later!
I blog frequently and I seriously appreciate your content. This great article has truly peaked my interest. I will take a note of your website and keep checking for new details about once a week. I subscribed to your RSS feed too.
Aw, this was an extremely good post. Finding the time and actual effort to make a great article… but what can I say… I procrastinate a lot and never seem to get nearly anything done.
I like it when people come together and share views. Great blog, keep it up!
I really like it whenever people get together and share opinions. Great site, stick with it!
Oh my goodness! Incredible article dude! Many thanks, However I am going through issues with your RSS. I don’t know the reason why I cannot join it. Is there anyone else having identical RSS issues? Anyone that knows the solution will you kindly respond? Thanx!!